
First, download the PDF version of this blog post so that you can keep it and use it over the next 7 days.
If you want to launch your blog successfully and start making money faster , just follow the steps outlined below.
Keep reading; in a minute, we will reveal the secret to blogging success .
In order to follow along, first, you need to download the 7-Day Launch Plan. The plan comes with 7 Faster Checklists and Templates.
In the meantime, if you already have a domain name in mind, get this 75% off WordPress hosting deal and register your domain name for free . This first step will motivate you to follow through the rest of the steps below and finally launch your blog.
This is the best way to start a blog. You will see why shortly.
Read this 7-Day Launch Plan at least twice and take action immediately, today. Prompt action is very important.
By the way …
If you are waiting for the perfect time to start a blog, that time will never come. Start with what you have, today. And use the results to make gradual improvements as you make progress.
You will see why this is super important.
Here is our story …
We have launched and built many successful blogs over the years and we have helped many of our clients do the same.
To avoid mistakes, procrastinations, delays, stagnations, roadblocks, and failures, we needed an implementation strategy that works best.
Drawing from our extensive experience, we have developed action tools that we call Faster Checklists.
These checklists are not like others; they are very special and very powerful. They are optimized to help start with the most important tasks, to help you start making money quickly. We will talk more about that in a minute.
Starting today, over the next 7 days, every day, you will receive one Faster Checklist to your email inbox. This 7-Day Launch Plan explains the tasks included in the checklists. This is the plan that you need to follow; it is simple and very efficient.
After you download the 7-Day Launch Plan, check your inbox for an email from us, every day, for the next 7 days.
Now, let’s get started …
Here are the tasks included in the Faster Checklist for Day-1.
When you receive the checklist, make sure that you complete all the listed tasks the same day. Prompt action is key to your success.
DAY-1: Faster Checklists, Niche, domain, hosting, contact email, and logo
To maximize your chance for success, it is important that you understand why you need to do things a certain way and why you need to use certain tools.
Before you start with choosing your niche, setting up your blog hosting, publishing your posts, etc., your first task is to know how to avoid failure, and how to use Faster Checklists to ensure success, faster.
Understand why many people fail to launch a profitable blog
This is important. It will be short.
If you’ve been trying to start a blog for a while but, many months later, you still don’t have a successful blog, it may be because you don’t have actionable Faster Checklists that are prioritized, and optimized for faster results.
When you don’t have Faster Checklists and you don’t know exactly what to do today and what to do the next day, the following happen.
- You get an impression that blogging is too much work and you keep procrastinating or postponing the startup.
- Even when you get started, you tend to start with doing things that are less important and things that don’t help you make money fast enough.
- You try to do everything yourself, you get overwhelmed, and when you don’t make any meaningful progress, you give up.
- You stay trapped into the pursuit of perfection by trying to do everything to your liking and not simply doing things that are proven to work.
The Faster Checklists help you avoid these mistakes and puts you on the path to growing a successful blog, fast.
Your next task is to discover why using the Faster Checklists is the best way to start a blog.
Discover why using the Faster Checklists is the best way to start a blog
Faster Checklists are lists of tasks that are strategically designed to help you get things done faster, launch your blog on time, and start making money within days, not months.
The Faster Checklists are a blogging productivity system that helps you to do the following:
- Know exactly what to do for the next 7 days, starting today.
- Prioritize the most important tasks.
- Delegate the less familiar tasks.
- Reduce the risk of errors, mistakes, and distractions.
- Track your progress and boost your motivation.
- And spend time only on things that are proven to work best.
Every Faster Checklist is designed to be completed the same day it is received to your email inbox. It contains the following:
- Prioritized tasks;
- Reliable freelancers;
- Effective tools;
- And simple templates.
More about prioritized tasks:
Other checklists that you find on the web are just random lists of compiled tasks that are not ranked according to importance; these checklists make you waste time on tasks that don’t help you reach your income goals within a reasonable time-frame.
Our Faster Checklists prioritize the most important tasks and rank in first position the tasks that help you make money with your blog as sooner as possible.
More about reliable freelancers …
Other checklists expect you to do everything yourself, even tasks that you’ve never done before. If you don’t know how to, they expect you to spend hours and days learning the steps.
This approach is prone to mistakes and delays that may frustrate you and even make you give up. It is less likely to lead you to early success.
In contrast, our Faster Checklist tell you which tasks you should do yourself and which ones you should hire freelancers to do them for you.
We know this from experience; don’t try to do everything yourself. Remember, as a blogger, you are not a producer, you are a publisher, a business owner. Your goal is to make money as sooner as possible.
Every Faster Checklist shares links to the most reliable freelancers that you can use to get things done correctly and on-time; even for tasks that are familiar but you may feel that you don’t have enough time to do them.
More about effective tools:
You don’t need sophisticated tools, nor do you need simple ones; you just need tools that work best.
Every Faster Checklist recommends tools that are ideal for you, as a typical startup blogger; tools that are reliable, affordable, and user-friendly.
More about simple templates:
Again, we are all about getting things done faster.
You don’t have to start everything from scratch, we have already done most of the work.
With the templates that you get from us, all you have to do is to fill in the blanks and replace the placeholders. This way, you get the tasks done in minutes instead of hours.
You will get templates included in many of the Faster Checklists that you will be receiving over the next 7 days. Use them and save time.
Learn how to use Faster Checklists
There is a reason why pilots and NASA astronauts use checklists for every takeoff and landing: to make sure that tasks are actually completed, correctly.
Checklists are very important. And the checklists that you will get from us are even more important.
For every Faster Checklist that you receive to your inbox, do the following.
- To avoid overwhelm, focus on one day at a time, and one Faster Checklist at a time.
- Do not postpone a single task. Stick to the schedule. “Doing it now” is better than “doing it tomorrow”. Also, “done” is better than “perfect”. Success comes from progress, not perfection.
- If you don’t have time or the skills to do it, hire a reliable freelancer.
Every day, check your email inbox and make sure that every task on the checklists is either completed the same day by you or is delegated to be completed by a freelancer.
In total, you will receive 7 Faster Checklists over the next seven days; together, they make this 7-Day Launch Plan.
By the way, you may find all the freelancers that you need here. Just do the search using the keywords that describe the task. For example: “logo design” or “blog post writing”.
When you receive a Faster Checklist, mark the email as “unread” and when all the tasks on the checklist are completed, mark the email as read. This is a simple way to track your progress.
If it is a task that you have never done before, or, if it is simply too time-consuming for you, delegate it; get a reliable freelancer to do it for you. This way, you save a lot of time and money in the long run, and ultimately maximize your chance to launch a successful blog on time, and to start making money much sooner.
Besides, some repetitive tasks are best done by freelancers.
Later on, you can always learn how to do things yourself and make improvements on the work done by the freelancers.
First, focus on getting the momentum going without interruptions.
Also, when working with freelancers, always aim to find full-time professionals that you can hire on a regular basis and ultimately make them permanent members of your team.
It is more productive to always work with the same people.
Now that you know how to avoid failure, how to use Faster Checklists to ensure early success, your next task is to select your niche.
Select your niche
Yoga, Weight loss, soccer, home cleaning, camping, etc. There are many profitable niches that may relate to your knowledge and experience.
Many people make this step complicated; it is actually simple. Remember, you can always broaden, adapt, or completely change your niche later.
Besides, the blog that you are starting now will be just one of the many blogs that you are going to build overtime. If you find a better niche later, start a new blog. But, right now, don’t waste time, don’t be a perfectionist, just pick a familiar and profitable niche and get started, today.
You can’t go wrong with a niche that is profitable, popular, and familiar.
We have made it simple for you to find the right niche for your blog. We’ve already researched and compiled a great list of over a thousand profitable and popular niches. We call it the 1K Profitable Niches. All you have to do is download it here, look at the list, and select the niche that is the most familiar to you.
You will also get the download link when you received the Faster Checklist for Day-1.
If you haven’t subscribed to receive the Faster Checklists, subscribe here to get the download links delivered directly to your email inbox when you receive the 7-Day Launch Plan.
Here is how it works.
There are 3 main factors to consider when selecting a niche:
- Profitability (Are there enough people spending money on the related products and services?);
- Popularity (Are there enough people searching the related reviews, tutorials, and answers?);
- And familiarity (Do you have sufficient knowledge about the subject?).
You don’t need to be an expert on the subject; you just need to have some experience with the related products, services, and activities. Just look at your shopping lists, your monthly bills, and your weekly activities; you will quickly find a blogging niche that is right for you.
For example:
- If you cook red beans every week, it means that you are familiar with red beans recipes, spices, pots, shops, common mistakes, etc.
- If you play basketball every weekend, it means that you are familiar with balls, sneakers, jerseys, nets, training, etc.
- If you go out with your spouse every Saturday, it means that you are familiar with the subject of romance, dining, flowers, romantic gifts, couple communication, conflict resolution, romance tips, etc.
- Etc.
Here is what you need to do now.
- Download the 1K Profitable Niches. Read the entire list to get familiar with the available options.
- From the list, select 5 niches about which you know a few things.
- And from the 5 niches, select the one niche that you like best. That should be your niche. At least for your first blog.
After you select your niche, move to the next step, setup your blog hosting and register your domain for free.
Register your domain name and setup your blog hosting
Let’s start with finding a good domain name …
We will give you a template to help you find a good domain name faster. But first, a quick tip …
Many people waste a lot time trying to find a domain name. If you are trying to find the perfect domain name, you may end up wasting a lot of time in vain.
There is no need to spend too much time here, if you find a good domain, select it and move to the next step.
If you still want a premium .com domain, you can always buy one later and use it for your blog. It’s actually easy to make the change. For now, just pick a domain name that is good and get started.
What is a good domain name?
A good domain name is:
- Short;
- Memorable;
- Relevant;
- And with a TLD that is trusted.
Here are the 10 most trusted TLDs: “.com”, “.co”, “.net”, “.org”, “.io”, “.blog”, “.site “, “.me”, “.name”, “.space”.
A quick note about choosing a hosting service …
For a successful blog launch, it is crucial that you choose a WordPress hosting that is reliable. Don’t be swayed by cheaper alternatives; if your blog is too slow or offline too often, you will lose visitors and won’t be able to make money.
You need a hosting service that has the following features:
- 100% uptime;
- Reliable and secure;
- And WordPress optimized;
We recommend ipage.com. It is affordable and beginner-friendly.
If you already have your domain name registered, go to ipage.com and setup your blog hosting.
To find a good domain name and setup the right hosting for your blog, download the List of One Thousand Domain Ideas, we call it 1K Domain Ideas. it is a simple domain search template. And then, take these simple steps:
- Open the template, you will notice that the placeholder keywords are “Home” and “Cleaning”.
- Replace the placeholders with two words from your niche keywords. You will obtain a list of domain ideas.
- From that list, pick 10 domain ideas that you like.
- Go to: https://www.ipage.com/domains and search if any of the selected domains is available. Search one by one so that you can get a new list of suggested domain ideas generated on the search page. Always have a look at the suggested list, you may find a domain that you like.
- If none of them is available, pick another 10 domain ideas from the list, go to https://www.ipage.com/domains and search again, one by one.
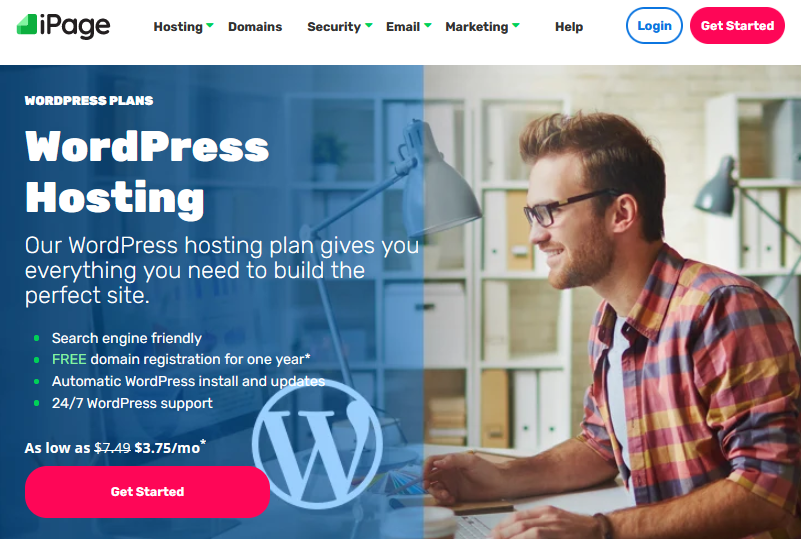
- Once you find a good domain name that is available, take this 75% discounted WordPress hosting deal at iPage.com, and register the domain for free.
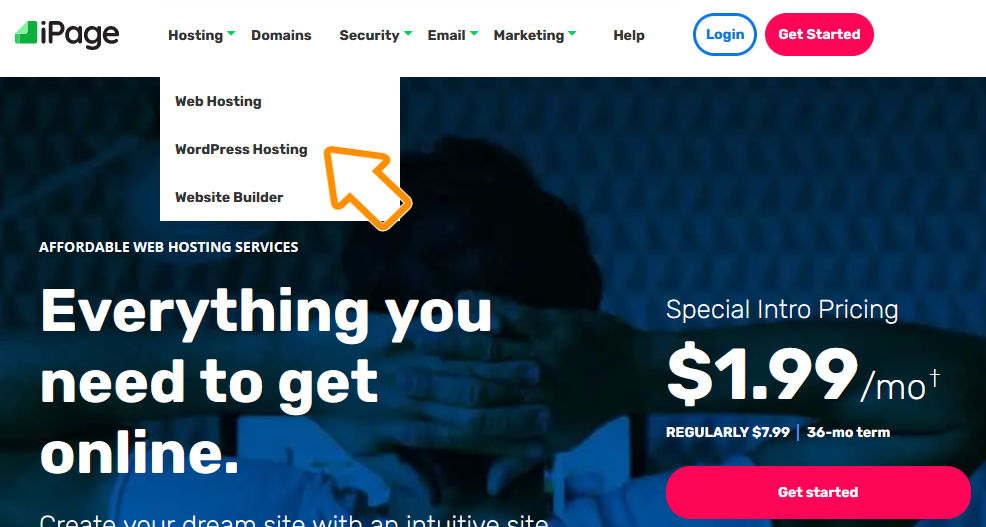
- On the page, from the top menu, click on Hosting and select WordPress Hosting.
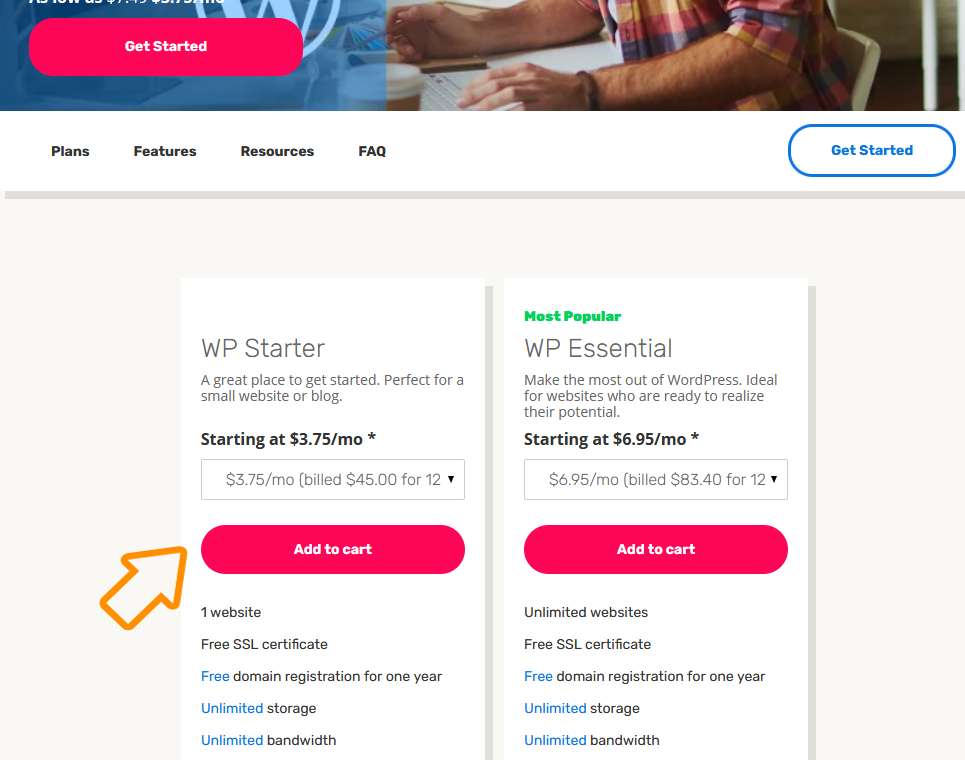
- Select the WP Starter package, which will be enough for your blog since you are just getting started. With this package, you get the domain registration for free . It’s a very good deal. You can always upgrade to a bigger package later once you start making some money. Click on Add to Cart.
- After you click on Add to Cart, on the next page, you will be asked to enter the domain name that you want to register for free. Enter the domain name that you had found and written down in the previous step. Click on Search.
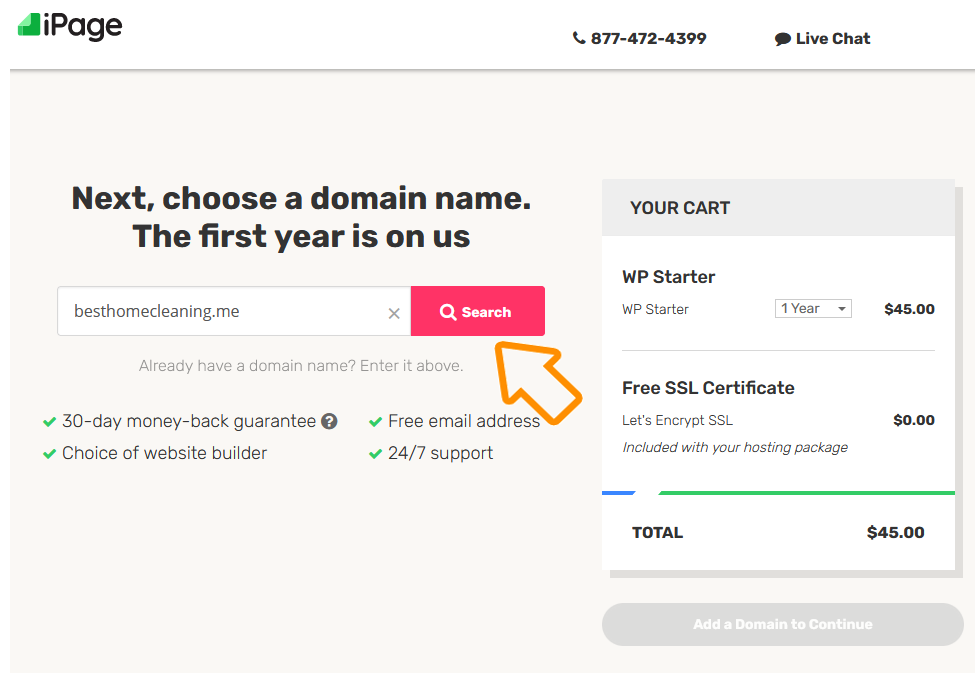
- You will get a notification that says “Congrats, your domain is available!”. Remove the Privacy + Protection that they add to your cart by clicking on the X symbol. You will add these features manually later; for now, all you need are the WP Starter, the free domain name registration, and the Free SSL Certificate. Click on Continue to Add-Ons.

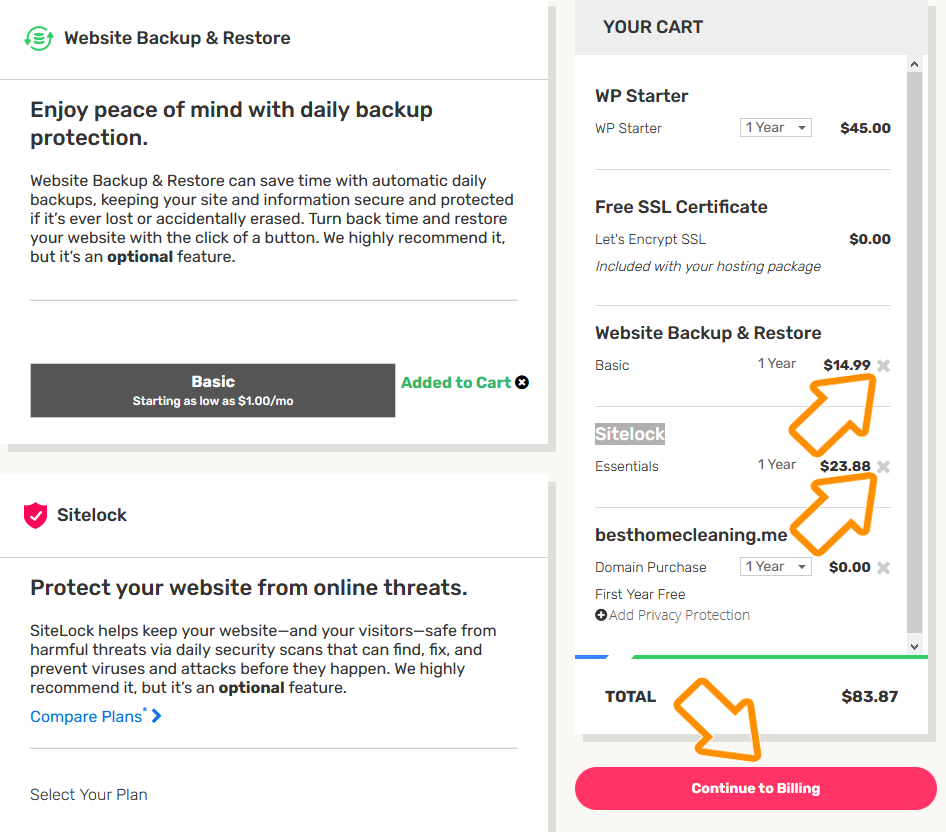
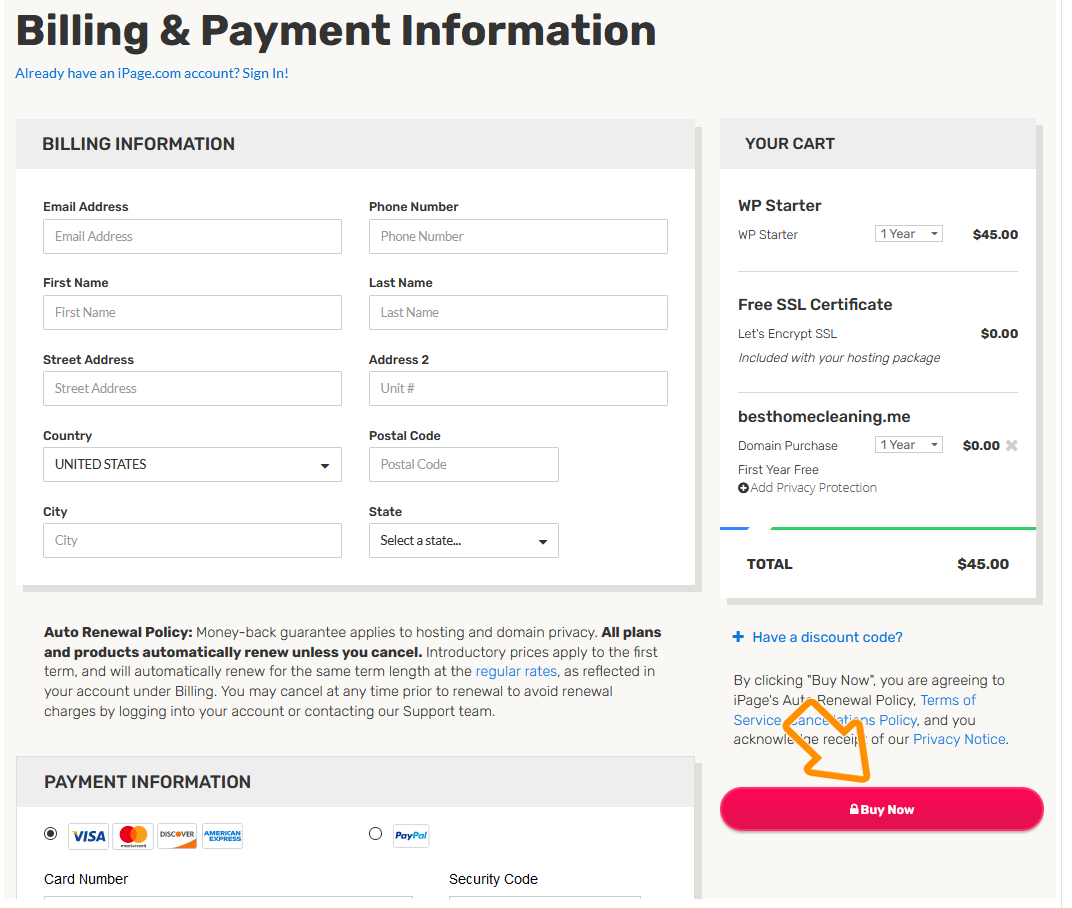
- You will get a notification that says “Get the most out of your plan”. From Your Cart, remove all other upsell products like Website Backup & Restore, and Sitelock. You will set them up later as your blog starts making some money. Click on Continue to Billing. You will see the Billing & Payment Information page.
- On the Billing & Payment Information page, enter your details and click on Buy Now.
Once you purchase and setup your blog hosting, you will get by email the confirmation, the invoice, and simple instructions to follow. Now, move to the next step: designing your blog logo.
Get your logo designed
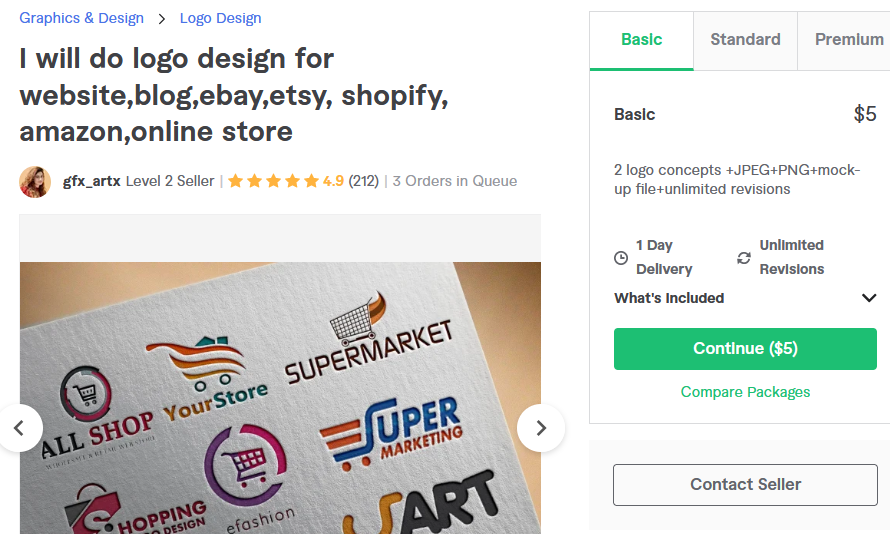
As a business, you need a brand image.
A well-designed logo will add the trust factor to your blog and improve conversion rate for the affiliate products that you recommend.
If you are not a designer, simply get this freelancer to design your logo for you.
After the logo design is done, tell the designer to crop a favicon from the logo. You will need to use the favicon later.
DAY-2: WordPress theme and essential plugins
For Day-2 and this set of tasks, you will receive the Faster Checklist directly to your inbox.
If you haven’t subscribed to receive the Faster Checklists, click here to subscribe.
Now that you have your niche selected, and your WordPress hosting setup, it’s time to install a great theme and the most important plugins.
If you’ve never done this before, don’t try to learn to do it yourself, get a freelancer do it for you. Once your blog has successfully launched, you can schedule 30 minutes per day to start learning how to do these tasks yourself and improve on the work done by the freelancers.
Right now, just focus on having things done so you can launch your blog within 7 days.
A WordPress theme gives your blog a look and feel, and the plugins give your blog the functionalities that it needs.
Installing them is fast but the time-consuming task is to do customizations and settings. If you are not familiar with a plugin, installing and selecting its settings can take you more time than you plan.
To keep your progress momentum and get these tasks done faster so that you can stay on schedule, we recommend that you hire an expert freelancer to complete the tasks.
The theme and the plugins that we recommend are the best according to our experience and according to the observation of many highly successful blogs. You can always make the changes that you want later, but for now, stick to the simple options that are known to work the best.
Start with these essential plugins, the basics; later you can install the additional plugins that you need.
The tasks include the following:
- Create your contact email using your domain hosting account (if you haven’t created a hosting account yet, do it here).
- Install and customize the right WordPress theme.
- Add the site title, tagline, and URL (refer to guidelines below).
- Set the permalink structure to “Postname”.
- Generate an XML Sitemap.
- Setup the 3 essential widgets
- Enable comment moderation.
- Change the default post category from “uncategorized” to your niche keyword.
- Add a Favicon.
- Setup “Contact Form”.
- Setup “Google Analytics Dashboard Plugin for WordPress by MonsterInsights”.
- Setup “Rank Math SEO”.
- Setup “MashShare Social Media Share Buttons”.
- Submit your website and the XML sitemap to Google Search Console.
- Test your blog display on different browsers and mobile devices.
Let’s explain each task.
Create your contact email
Start with creating your contact email address.
As a blogger, you will be often contacted by people with queries. Make sure that you set up a special email that people can use to contact you.
Also, many affiliate platforms require that you have a premium email address under your blog domain name. For example, they would require that your email be “myname@homecleaning.com” instead of a free email address like “myname@gmail.com”.
Take the time to create an email that looks professional. It’s important.
Install and customize a WordPress theme
As a startup blogger, you need a theme that is lighter, faster, and easily customizable. We recommend the popular theme Astra; it is simply the best.
Add the site title, tagline, and URL
For example, if your niche is “home cleaning”, your site title would be “Home Cleaning” and the tagline would be “Easy and Quick Ways to Clean Your Home”. And the URL would be: https://www.homecleaning.net/
Set the permalink structure to “Postname”
Instead of:
https://www.housecleaning.com/?p=10467
Set the permalink to a human-readable and SEO-friendly URL:
https://www.housecleaning.com/how-to-clean-a-fridge/
Generate an XML Sitemap
This helps search engines crawl and read your website content in a machine-readable format. This is very important for SEO.
Setup the 4 essential widgets
To give your readers access to the most important parts of your blog, enable the right sidebar and add these 4 essential widgets.
- A search widget to allow visitors to find a blog post published on your blog.
- Your short author profile to introduce yourself to your readers.
- Your newsletter opt-in form to make it easier for visitors to subscribe to your newsletter email list. You will get the opt-in form code in Day-3 checklist.
- And the list of recent blog posts.
Later, you can add more widgets as needed.
Enable comment moderation
This allows you to approve a comment before it shows on your blog.
Change the default post category from “uncategorized” to your niche keyword, for example, “Home Cleaning”.
This helps with SEO and better user experience.
Add a Favicon.
A favicon gives your visitors a visual reference point to your blog when they have multiple websites and tabs open at the same time.
Get the favicon that your logo designer cropped from your logo, add it to where your theme indicates.
Setup “Contact Form by WPForms”
To allow people to contact you by email with queries and monetization opportunities, instead of just displaying your email address on a page, give people a form to fill in.
In a later step, you will create a Contact page and add the contact form code that the plugin generates.
Install and setup Contact Form by Fluent Forms.
Setup “Google Analytics Dashboard Plugin for WordPress by MonsterInsights”
To give you a simplified dashboard that displays Google Analytics for your blog.
Install and setup Google Analytics Dashboard Plugin for WordPress by MonsterInsights.
Setup “Rank Math SEO”
This plugin is like Yoast SEO but better. It allows you to optimize for search engine ranking every blog post that you publish.
Install and setup Rank Math SEO.
Setup “MashShare Social Media Share Buttons”
To add Facebook, Twitter, LinkedIn, and other social networks share buttons on your blog so that your readers can be able to share your blog posts with just a few clicks.
Install and setup MashShare Social Media Share Buttons.
Submit your website and the XML sitemap to Google Search Console
Google Search Console is a free tool that tracks websites ranking and detects errors in indexing. It helps website owners monitor and maintain progress in raking for their websites.
Submit your blog to Google Search Console and Bing Webmaster Tools the same day it goes live so that these tools can start collecting data. It’s very important.
Later on, you will need this data in order to make improvements for SEO.
Test your blog display on different browsers and mobile devices
Doublecheck that your blog layout and content display correctly on mobile devices and on the 5 most popular browsers: Chrome, Edge, Mozilla Firefox, Safari, and Opera.
DAY-3: Setup your email newsletter account
With your blog hosting setup, your theme and plugins installed, now, setup a way to bring people back to your blog: newsletter.
Email marketing is the most important effort; it is the only reliable way for people to come back to your blog after a visit.
Also, given that people usually make a purchase only after several exposures to a sales page, you need to send them multiple email reminders to bring them back to your blog posts and expose them to the products that you are promoting.
For that, you need a newsletter service, also sometimes referred to as an autoresponder service, or email marketing software.
You need to setup three components: a newsletter, a list, and a signup form.
- List (Audience): a group of subscribers who will be receiving newsletters targeted to them. For now, as a startup, you only need one “list/audience”; later, as you create more offers to bring in more subscribers, you may create additional “lists/audiences”.
- Signup form: a set of fields where visitors can enter their names and email addresses. When you create a signup form, you will get a code that you can copy and paste onto your Newsletter Page or Landing Page, which you will need to create in the later steps.
- Newsletter: the email content itself. For now, it will be just a couple of paragraphs inviting recipients to your blog to read a newly published blog post. Also, it may contain some bonus tips that you share only with people who subscribe to your newsletter.
If you’ve never setup a newsletter before, it’s best that you get an expert freelancer to do it for you.
The only thing that you need to do is to create your free trial account at GetResponse.
Once you create your account, tell the freelancer to setup the list, the signup form, and the first blank newsletter template.
Also, ask them to add the signup form as a widget on the sidebar.
Create an email marketing account
There are other equally good email marketing services like Aweber, Mailchimp, and Convertit. But GetResponse is best for beginners; it is affordable, and easier to use.
Go to GetResponse.com, create a free account, and use the 30-day free trial.
Setup a list, a signup form, and a blank newsletter
Hire this freelancer to setup a list, a signup form, and a blank newsletter. Tell them to give you the opt-in form code that you can later add to your blog’s “Newsletter page” and on a sidebar widget.
Later, once you get the first newsletter content written, just add the content in the blank newsletter.
You will need to share your username and password with the freelancer. Once the job is done, change your password to keep your account secure.
By the way, as a blogger, expect to change your passwords regularly; it is best practice for data security.
Schedule time to learn how to broadcast your first newsletter
It’s actually easy to write and send a newsletter to your list.
Whenever you publish a new blog post, review the steps on how to create and send a newsletter, and send the newsletter to announce that a new blog post is published, even if you still have only 5 subscribers on your list.
Open your calendar, schedule this learning task a week from now.
Start planning to create more lead magnets to grow your list
A newsletter offer is good enough as a lead magnet, especially when you are getting started. In fact, there are top bloggers who use only a newsletter offer to grow their email subscribers list.
But, in most cases, you will need to create more offers to give your readers more reasons to opt-in to your email list.
Make sure that your offer gives people great value. It may be an e-book, a reference sheet, a mini-course, etc.
Open your calendar and schedule a day when you will create a valuable piece of content that you can give to your visitors for free in exchange for their email addresses. Aim to get this done within 30 days after the launch.
If you are short on time, get a freelancer content writer to create a lead magnet for you.
DAY-4: Write and publish the content for the essential pages
To complete these tasks successfully, use the Faster Checklist that you will receive on day 4.
You may subscribe here to receive the 7 Faster Checklists, one a day, over the next 7 days.
Outsource to the recommended freelancers as many tasks as possible. Speed is essential to your startup success. Think of yourself as a project manager, as a business owner.
This is just another advantage of blogging with WordPress: efficiency. All you have to do is get your blog hosting, install WordPress with one click, install a great theme, and you are ready to publish content. No need to code anything.
You need pages that people can visit when they need more information or guidance about your blog.
Some of these pages should be added to the header menu (the main menu), and others to the footer menu.
Start with the 6 most important pages:
- Home;
- About;
- Contact;
- Newsletter;
- Privacy Policy;
- And Terms of Service.
To keep the momentum going, it is best that you get expert freelancers to write and optimize the pages content for SEO. Just send them an outline of what you want the content to say and they will do the rest. Generally, they would know what needs to be said in these pages. They are experienced.
Let’s explain each task.
Write and publish a “Home” page
This is where you would want people to land first when they visit your blog. This is where you will display the list of your recently published blog posts.
Make sure that the page displays the blog posts’ titles, snippets, and prominent links to the full articles. Most themes display these by default.
As your blog grows, you can replace the Home page with a page that guides readers to your best blog posts and other categories. Also, you can add your opt-in form on the Home page to allow your readers to join your newsletter.
Create a “Home” page, add it to the main menu as the first menu item.
Write and publish an “About” page
Think of this as a space where you make a soft sale for yourself and your blog.
This is where you tell your story. You may mention your credentials, achievements, and objectives.
Tell your readers something about you, about what you offer on your blog, and what they stand to gain by visiting your blog regularly. Ask them to contact you should they have a question.
Create an “About” page, add it to the footer menu, and publish the content.
Write and publish a “Contact” page
This is where you tell people how they can reach you and how long will it take for you to reply. Also, highlight that your blog is available for affiliate promotions and advertising spaces.
Create a “contact” page, add it to the header menu, and publish the content.
Next, take the contact form code that the Fluent Forms plugin had generated and add it to the page.
Test the form to make sure that when people submit the form, you can actually receive their message to your email inbox.
Write and publish a “Newsletter” page
Most of the people that land on your blog may never return. You need a way to bring them back. Ask them to join your newsletter list so that you can send them an email every time you publish a new blog post.
Also, building your email list make it easier to promote affiliate products to your subscribers.
The content on the newsletter page should be like a sales pitch. The goal here is to persuade your visitors to join your newsletter, to tell them why they need to subscribe.
Create a “newsletter” page, add the link to the header menu, and publish the content.
Copy the signup form code that you got from GetResponse and paste it into the page.
Test the opt-in form and see if you actually receive the new subscriber to your email list.
Write and publish a “Privacy Policy” page
There are many “Privacy Policy” templates for bloggers but you need to get an expert freelancer to choose the right one for you and customize it properly.
Create a “Privacy Policy” page, add it to the footer menu, and publish the content.
Write and publish a “Terms of Service” page
Similar to the “Privacy Policy” page, you can find a lot of templates for the “Terms of Service” content. Get an expert freelancer to craft one for you based on a template.
Create the “Terms of Service” page, add it to the footer menu, and publish the content.
Test all links and buttons
Before you mark the tasks as done, make sure that everything works as intended.
Click on every link in all the content of the pages to make sure that every link works correctly. Fix all broken links and 404 errors, if any.
DAY-5: Write and publish the content of your first 3 blog posts
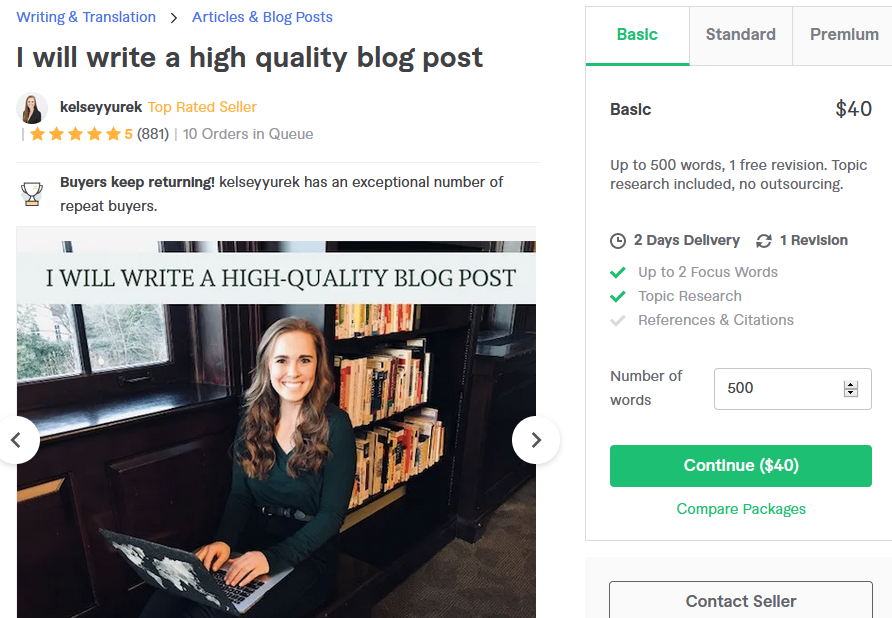
If you are not very proficient at writing and optimizing blog posts, just hire a freelancer to write them for you. Tell them the topics and they will communicate with you about the rest.
With time, as you start getting some experience with the writing process, you can start writing some blog posts yourself, if you prefer. Remember, as a blogger, you don’t have to write all the content yourself; you may get freelancer ghostwriters to do that. Simply take the role of a publisher or a business owner.
Start with just 3 blog posts. You don’t need more than that in order to launch your blog.
For each blog post, you need to follow these 3 simple steps:
- Select the topic;
- Do keyword research;
- Write the content;
- Optimize the blog post for SEO;
- And publish the blog post.
Select the topic
As you have already selected your niche, you might already have an idea of what you want to talk about in your first blog post. For example: how to clean a microwave.
Don’t spend too much time on this task; you can always write about more topics later.
Do keyword research
With the topic in mind, you need to find keywords that you can use in the URL, title, H1, H2, H3, and throughout the body of the blog post.
Optimizing your blog post helps search engines scrawl and understand what the content is talking about so that they can rank it for relevant search queries.
Moreover, doing keyword research helps you get other important data such as search volume and additional topics.
To do keyword research properly, use Long Tail Pro, it is the best tool for the job. Start the 30-day free trial here.
However, if you’ve never done keyword research before, just hire a freelancer to do it for you. Tell them the topic and they will send you the list of keywords.
Write and optimize the content
It is more efficient to write the content first and optimize it for search engines later.
You don’t need to start with an epic blog post; you can always expand and improve an already published blog post. Just focus on providing value to your readers.
Simply ensure that a reader is able to make an informed decision or solve a problem after reading your blog post.
If it is your first time writing a blog post, it is best to get a reliable freelancer to write it for you.
To get higher Google ranking, make sure that the blog posts are properly optimized for SEO.
If you are new to on-page SEO, tell your freelancer writer to complete this task for you. Most freelancer writers include keyword optimization in their offers.
Overtime, you may learn how to do it yourself if you prefer.
Publish the blog post
Add the blog post, format the content, and click publish.
Do the same for each of the first 3 blog posts.
Congratulations! You now have a live blog.
You may ask the same freelancer who wrote the blog post to format and publish it for you.
But it is not the time celebrate yet. You still need to monetize your blog; you need to make money from your work.
There are two remaining tasks: join affiliate programs and promote your blog.
We will show you how. Keep reading.
A quick note: some affiliate programs may require that you to have a certain minimum of traffic to your blog before they accept you. If they reject you, don’t worry, just follow the steps below to promote your blog, generate some traffic, and later, apply again.
After you publish your first 3 blog posts, don’t forget to double check all the links and the optimizations.
DAY-6: Join affiliate programs and advertising networks
Make sure that, so far, you have already completed at least the following tasks:
- Setting up your blog hosting, and registering your domain name for free.
- Installing a WordPress theme and the essential plugins.
- Setting up your email newsletter account.
- Getting the essential pages written and published.
- And writing and publishing your first 3 blog posts.
After the launch, it is time to monetize your blog.
The most reliable ways to make money with your blog are affiliate marketing and advertising.
Join affiliate programs and networks
Many affiliate programs require you to have a website and a premium email address, for example: myname@homecleaning.com. If you have already setup your blog hosting in the previous steps, this is not a barrier for you because you already have a blog and a premium email address.
All you have to do now is to join the affiliate programs that will allow you to make money from the products and services that you mention or recommend in your blog posts.
Start with affiliate networks.
First, search and join all the affiliate networks relevant to your niche. Here are the 10 most popular affiliate networks:
- Amazon Associates;
- eBay Partner Network;
- Walmart Affiliates;
- Clickbank;
- CJ Affiliates;
- MaxBounty;
- ShareASale;
- Awin;
- Rakuten;
- Peerfly; etc.
If your blog is about helping people solve problems, there is definitely an affiliate network out there that sells products that people can use.
Next, for affiliate programs that are not available on any of the affiliate networks, visit the websites of the products that you have mentioned or recommended in your blog posts, look for the page about their affiliate programs or partner programs and apply using your premium email address.
Always keep looking for more affiliate programs and networks; you may just land on the most profitable one for you.
Join advertising networks
Providing advertising space on your blog is the easiest way to make money with your blog. The most common requirement is that your website have a certain amount of traffic.
Visit every network and review their requirements. If your blog qualifies, apply immediately.
The most popular networks are Google AdSense and Amazon Native Shopping Ads.
If you are rejected at first, generate some more traffic to your blog and apply again later.
Here are the 20 advertising networks that you can start with.
- Google AdSense
- Amazon Native Shopping Ads
- Media.net
- PropellerAds
- Adversal
- Skimlinks
- Monumetric
- InfoLinks
- PopCash
- PopAds
- RevContent
- Adsterra
- SHE Media
- AdRecover
- MadAds Media
- Bidvertiser
- Adbuff
- BuySellAds
- And AdClickMedia
Once they accept you, they will send you instructions on how to add space for their ads on your blog so you can start making money immediately.
You will not become a millionaire with advertising networks but you can make some stable monthly income.
Here is an example, a possible scenario for how much income you can make for displaying ads on your blog.
- If the number of ads displayed on your blog is 5 and the daily number of visitors is 3,000;
- Your daily number of ad impressions will be 5×3,000 = 15,000 impressions /day.
- And, if the average earning per 1,000 impressions is $3;
- Your average daily earnings will be (15,000/1000) × 3 = $45 / day.
- Therefore, your average monthly income will be $45 × 30 days = $1,350 / month.
Also, you can make money every time a visitor clicks on an ad. If you achieve even a 1% click-through rate, your monthly income will grow much higher.
DAY-7: Promote your blog posts
To make money, you need people to visit your blog; you need them to subscribe to your newsletter, and to click on your affiliate links.
Many startup bloggers rely only on search engine ranking for traffic; you don’t have to. You can manually bring visitors to your blog and start making money the same day you launch your blog.
This proactive approach to traffic generation actually helps your blog rank on the search engines much faster.
Besides, it is a big risk to wait to get first page ranking from search engines; you may never really know when it will happen. Sometimes, due to competition, it doesn’t happen at all.
Actively promoting your blog helps you to start making money much sooner.
Moreover, seeing results quickly will motivate you to continue with your efforts and will maximize your chances of success.
Don’t wait to be ranked on Google; instead, spend at least 30 minutes a day to proactively attracting visitors to your blog. Here is how.
- Mention and contact influencers.
- Comment on influencers social posts.
- Add value to influencers blog posts.
Let’s explain each point.
Mention and contact influencers
When you research for a blog post, you will get to learn a few things from other bloggers. Also, you may simply be inspired by certain things that they say. Make sure that you quote them or describe what you’ve learned from them and mention their names.
Make the list of all the bloggers that you’ve quoted or mentioned in your blog post. Use that list to contact each one of them and let them know.
They will be happy with mentions and many of them will share your blog post to their audiences.
If they don’t reply after you send them an email, go to one of their social media profiles and send them a private message or simply leave a comment on one of their social posts. You may tell them something like:
… Hi, John, I’ve just quoted you in my latest blog post. Here is the post: https://www. myblog.com/a-blog-post
Just search your name on the page, you will see the paragraph where I share your brilliant insights on … [SUBJECT].
I hope you like it …
That’s it. They will check out the blog post and probably share it with their followers. You get free targeted traffic.
Comment on influencers social posts
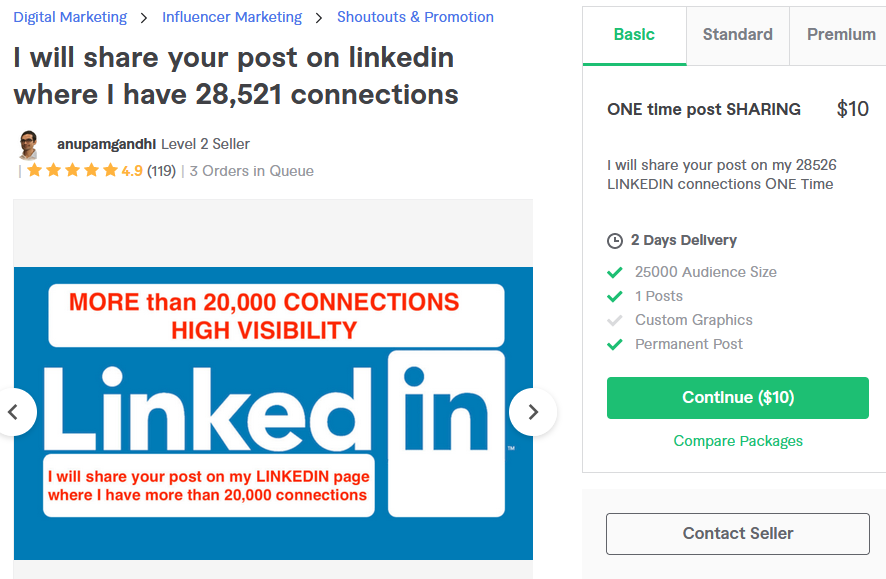
Follow the big players in your niche on their social media profiles: YouTube, Facebook, Twitter, Linked, Pininterest, Instagram, etc.
Immediately after they post an update, make sure that you leave a relevant and helpful comment and share a link to your blog post.
In the comment that you leave, always recognize them for the content in their post and add something that elaborates on what they say.
Their followers will see your comment and some of them will click on your link and visit your blog.
Your comment may sound something like this:
… Hey, John, that’s a great perspective. Thanks for sharing. Last year, I discovered the same thing. To do xyz successfully, you need to take step 1, step 2, step 3, etc.; I just wrote a blog post about my experience: https://www. myblog.com/a-blog-post …
Add value to influencers blog posts
Many influencers in your niche have blogs. Follow their blogs and regularly add comments to their blog posts.
A comment that you leave usually includes your name, your profile picture, and a link back to your website. Many people who read your comment may click on the link and visit your blog, especially if you leave a helpful comment.
Please note that some blogs don’t allow sharing links. If this is the case, it’s more likely that they will allow you to link your profile name to your website.
Also, if you comment regularly, you will start being noticed by the blog owner, which gives you the opportunity to start building a relationship. They may even visit your website and share your blog posts to their followers.
Your comment may look as follow:
… Great job; that’s a great tip, John. I just want to add another point. For those who want to do xyz this way, I think they should start with xyz. I just shared similar tips on my blog: https://www. myblog.com/a-blog-post …
Remember, always add value to the blog post with your comment. People who read your comments should feel that you didn’t waste their time.
Tell a story, mention a case study, cite some research data, add an interesting tip, etc.
It will take fewer than 7 days to start getting some targeted traffic to your blog. Just be consistent.
With a little more daily effort, visitors will start subscribing to your newsletter and clicking on your affiliate links. Within days, you should be able to make your first affiliate sale, and your money-making journey shall start.
Taking action
As any success coach would tell you: the best time to start is not later but now.
If you don’t take action now, another year may go by and you wouldn’t still have a monthly income.
Take action now; get started today. Do not wait for the perfect time; the perfect time will never come.
Within 7 days, you will have a live blog, ready to start making you money.
Here is your first step.
Get the 7-Day Launch Plan, the Faster Checklists and the Templates directly to your inbox, just enter your name and email address in the form on this page.
You will receive one Faster Checklist per day, over the next 7 days.
Now that you have the Faster Checklists on their way, here is your to-do list, in summary.
- Setup your blog hosting, and register your domain name for free.
- Install a great WordPress theme and the most important plugins.
- Setup your email newsletter account.
- Get the essential pages written and published.
- Write and publish your first 3 blog posts.
- Join affiliate programs and advertising networks.
- Promote your blog posts.
Now, as promised, here is the secret to starting a blog successfully and to making money faster: hire freelancers to do almost all the work for you during the first 7 days; and then, as you start promoting your first blog posts, start the process of learning how to do things yourself, if you prefer to do certain things yourself.
Hiring reliable freelancers to do most of the work will help you avoid these failure traps:
- Wasting too much time on unfamiliar tasks;
- Making too many mistakes;
- And, drowning into the pursuit of perfection.
Stick to this 7-Day Launch Plan; get things done as fast as possible. Remember: speed maximizes the likelihood of success.
To get started, get this 75% discount hosting deal and register your domain name for free. This simple starting point will motivate you into completing the rest of the tasks.
Click here to download the PDF version of this blog post. You will need it later.
To your blogging success!